Today's date should be inserted in the area below "Date", which has remained empty up until now. However, we don't want to type it manually, as we would rather leave this task to Write.
To do so, press the Tab key again behind what you just entered in order to reach the correct position.
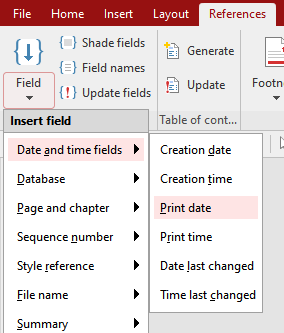
Then click on the small arrow next to the Field icon on the ribbon tab References | group Fields (alternatively, Insert | group Text). The program opens the following dropdown menu:

In the dropdown menu, point with the mouse to the entry Date and time fields and another menu level will be displayed. Click on the field Print date here.
Note: If you want to specify the format of the inserted date, you can open a dialog box with additional options for fields by clicking directly on the Field icon ![]() . For more information, see Fields.
. For more information, see Fields.
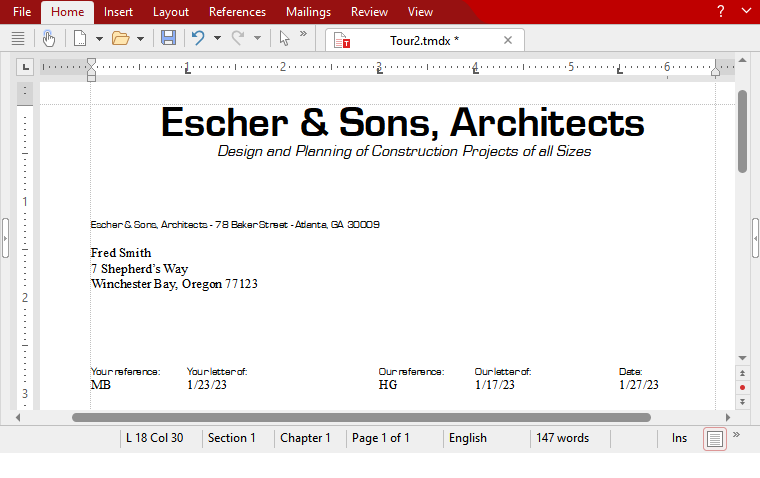
Write now inserts the current date into the text, and the letterhead looks something like this:

Fields are very practical aids. On the one hand, you have just saved yourself the trouble of manually typing the current date. In addition, the field "Print date" is not a set value, but symbolizes the current date instead. It is automatically updated when you print the document. Thus if you print the sample letter tomorrow, tomorrow's date will appear in the same place.
Fields not only enable you to insert the date, but also allow your document's current page number or file name to be output – and much more.
Furthermore, fields can be used to insert database fields from a database, as is required for a mail merge.